General

Managing Heat and Humidity at Car Wrap Shops in Toronto

July in Toronto hits differently in a wrap bay. Step inside one around 2 in the afternoon on a 31-degree day with the sun blasting through the south-facing windows, and the bay temperature is climbing into the high 30s pretty fast. Humidity sits somewhere around 70 percent on a typical summer afternoon. Add a couple of installers working under heat guns, and the air gets thick enough that you can feel it on your skin within a minute of walking in. This is the environment in which a wrap install must occur for roughly four months of the year.

Most car owners assume wrap installs happen in some kind of climate-controlled clean room. Reality is messier than that. The busier car wrap shops in Toronto that installers run usually have HVAC and dehumidifier setups, but conditions still shift hour to hour and season to season. A bay that worked perfectly for a vinyl install at 9 in the morning behaves differently by 3 in the afternoon. The shops that consistently turn out clean work have figured out how to read those conditions and adjust around them.

Anyone who’s searched PPF near me looking for a quote and wondered why some shops book two weeks out while others have same-week openings, climate management is part of the answer. Shops that take the bay environment seriously turn fewer cars per week because they wait for the right conditions instead of just plowing through the schedule. This piece walks through why heat and humidity matter so much for vinyl and PPF work, and what shops actually do to manage both.

Why Vinyl Hates High Humidity

Humid air is full of moisture, and that moisture is the enemy of clean adhesion. When humidity climbs past about 65 percent, water starts condensing onto cooler surfaces in the bay, including the painted panels of the car waiting to be wrapped. Most of the time, this isn’t visible. The panel just feels slightly cool and slightly damp to a gloved hand running across it.

Lay vinyl over a damp panel, and the adhesive can’t bond properly to the paint. There’s a thin layer of water between the two, and PSA doesn’t grip through water. What you get is what installers call silvering. Tiny moisture pockets are trapped beneath the film, appearing as a faint silvery haze when light hits them just right. Sometimes these dry out and disappear over a few weeks. Sometimes they don’t. By then, the cars had already left the shop, and the customer was calling back to ask what those weird specks were.

Why Heat Cuts Both Ways

Heat helps PSA flow into the paint texture. That’s the same chemistry that makes wraps stick well in warm conditions. Push it too far, though, and the adhesive flows too quickly; the vinyl stretches in directions the installer didn’t intend, and the film loses dimensional stability as it’s squeezed into place.

A 35-degree bay also makes the car’s metal panels hot enough that the adhesive activates the second the film touches them. That means no repositioning. No fixing a slightly off-center alignment. The wrap goes down where it lands and stays there. Skilled installers can work in those conditions, but the margin for error drops to nothing. One miss on the first lay-down, and the panel needs a fresh sheet of film.

How Shops Actually Manage the Environment

Three pieces of equipment do most of the work in a serious wrap bay. Industrial dehumidifiers run constantly throughout the summer to reduce humidity to the 40 to 50 percent range. Spot cooling, usually portable AC units pointed at the work area, rather than trying to cool the entire bay. And panel prep with isopropyl alcohol right before the film goes on, because alcohol evaporates fast and pulls any surface moisture with it.

Some shops also pre-cool the car itself by parking it indoors for a few hours before installation. Bringing a hot car straight in from a parking lot guarantees condensation problems because the cool conditioned air hits the warm panels and dumps moisture all over them. Cars that sit in the bay for half a day usually come out cleaner than those installed within an hour of arrival.

The PPF Side of It

Paint protection film is more forgiving than vinyl in some ways and less forgiving in others. PPF goes on wet, meaning installers spray a slip solution between the film and the panel during install. That solution gets squeezed out as the film positions, and what’s left underneath is supposed to be just water that dries off cleanly over 24 to 48 hours.

In high humidity, the dry-down takes way longer. Water that should clear in 36 hours sometimes sits under the film for four or five days. During that time, the bond is incomplete. The owner picks up the car, parks it outside, and the underside of the PPF is still working its way to full grip. Most shops factor this into their summer scheduling by extending the no-wash period and warning customers about the longer cure time.

If you’re comparing quotes after searching for PPF near me, ask specifically about summer installation timing. A quote that includes a longer dry-down window and clear instructions not to wash for 2 weeks is from a shop that respects the chemistry. A quote promising same-day pickup and immediate use in July either oversimplifies or skips steps.

Reading the Forecast Before Booking

Some Toronto installers genuinely watch the weather before scheduling the trickier installs. Colour-shift wraps. Full-body PPF jobs. Anything where a single mistake means redoing a full panel. Shops will sometimes shift bookings by a day or two when a heat wave is forecast, simply because the bay environment will be harder to control during the peak.

This level of attention isn’t universal. Plenty of shops just install whenever the appointment is booked, regardless of conditions. The difference shows up six months later, when wraps from one shop are still tight and clean, while those from another shop are silvering, lifting, or showing edge contamination from incomplete curing. Anyone running the comparison across different car wrap shops Toronto buyers actually trust will hear stories about which shops adjust for weather and which ones don’t.

What Owners Can Do

Booking summer installs early in the day helps. Bay temperatures climb through the afternoon, so a 9 AM start gets the install done while conditions are still manageable. Late afternoon slots in July and August are the worst time to bring a car in because the bay has been heating up since morning, and the dehumidifier is fighting a losing battle by then.

Owners can also help by parking indoors the night before if possible. Garage-stored cars arrive at the shop already close to bay temperature. Cars baking in a driveway all morning need an hour or two just to stabilize before any film can go on. Studios like Colibri Car Styling will sometimes ask owners to drop off the night before, during peak summer heat, for exactly this reason. You can check the PPF service options here for how summer scheduling typically works at a shop that takes climate seriously.

Featured Image Source: https://www.magnific.com/free-photo/handsome-man-checking-car-dealership_5873041.htm#fromView=search&page=1&position=16&uuid=ec7cc1eb-f098-44db-b1f9-26ae5ae583a3&query=heat+and+humidity+in+car+shop

General

Why Your Smart Car Needs More Than Paint: Auto Body Shop Insights

Cars are different now. They’ve been getting different for a while, but the change really accelerated around 2018, and most owners haven’t quite caught up. The car looks the same on the outside. Mirrors, bumpers, fenders, and a hood. The thing is, behind those panels there’s a whole sensor network most drivers couldn’t point to on their own car, and when one of those panels gets hit, the sensors behind it might or might not still be doing what they’re supposed to.

Somebody backs into your bumper at like 8 mph in a parking lot. Damage looks cosmetic. The car drives fine. You think, okay, paint match plus a new bumper cover, in and out in a week. What you don’t realize is that the bumper houses the radar unit for adaptive cruise control, four ultrasonic parking sensors, and, on some models, a second radar for blind-spot detection. Calling around to every auto body shop in Sacramento for a quote doesn’t help if the question you’re asking is just about paint.

The shops that actually understand modern vehicles bring up calibration before you do. They know that swapping a bumper cover without recalibrating the radar behind it leaves you with a car that thinks the SUV in front is six feet farther away than it is. A real auto body repair shop talks about scan tools and OEM procedures from the first phone call. Relux Collision is one of the family-owned places in town that handles this side of the work as standard rather than as an upcharge.

What Lives Behind the Panels

There’s usually a forward-facing radar unit centered behind the lower grille or built into the bumper cover. Adaptive cruise control runs off this. Automatic emergency braking, too. Plus four to six ultrasonic parking sensors spread along the bumper edges.

Windshield. Behind the rearview mirror on most newer cars, there’s a forward-facing camera that handles lane-keeping, lane-departure warning, and traffic sign recognition. This camera needs to be precisely aligned to the road, or it sends bad data to the rest of the system.

Side mirrors. Many models have small cameras tucked inside the mirror housings for blind-spot monitoring and surround-view. Some cars now have cameras instead of mirrors entirely, such as the Audi e-tron and certain Honda models. A mirror replacement on these isnt the same job it used to be.

Rear bumper. Mirror image of the front. Rear radar for cross-traffic alert, ultrasonic sensors for parking, and sometimes a rear camera. Anybody who backs into something is probably damaging more than just the bumper cover.

Calibration Is Not Optional

Here’s the part that catches owners off guard. When any of those sensors gets disturbed, even slightly, the car needs to be recalibrated. This isnt a soft suggestion or something to skip if you’re on a budget. The car won’t tell you the calibration is off in most cases. It just quietly starts making slightly wrong decisions about distance and lane position.

Calibration breaks down into two types. Static, where the car sits in a marked-out work area with calibration targets at OEM-specified distances, and the technician runs a procedure that tells the sensors where they actually are. And on-road, where the technician drives at specific speeds for specific durations on roads with clear lane markings while the system re-learns its alignment.

A lot of vehicles need both. Some only need static. Toyota and Honda lean on the road for some sensors. Subaru and certain European brands lean almost entirely static. OEM service procedure tells you which one applies, and a shop that knows what they’re doing will either have the equipment in-house or sublet it to a calibration specialist.

Why DIY And Cheap Shops Get This Wrong

Cheap shop, parking lot bumper repair, $400 turnaround in two days. Sounds great. Here’s what often happens. Bumper cover gets popped off, replaced or repaired, painted, and popped back on. The radar unit behind it got bumped during the work. Maybe the bracket holding it shifted by half a degree. Nobody recalibrates anything because the shop doesn’t have the equipment, and the customer didn’t ask. The car drives away looking great.

Three weeks later, the customer notices their adaptive cruise is acting weird. Maintains following distance fine on flat highway, but on hills it brakes harder than it used to, or it starts coasting toward the car ahead at low speeds. They blame the road, the weather, anything but the bumper job. Eventually,y a service shop figures out the radar is misaligned and recalibrates it. The original “savings” from the cheap repair just got erased, plus more.

Or worst case, nobody figures it out. The car continues operating with miscalibrated sensors. Maybe nothing bad happens. Maybe something does, three months down the road, in conditions where the system was supposed to help and didn’t. Not hypothetical, IIHS has documented cases of post-repair calibration failures contributing to accidents.

What To Ask Before Any Repair Begins

A few questions worth asking the shop before you authorize work, especially on any vehicle 2018 or newer.

Will any sensors need recalibration after this repair? Do you do calibration in-house or sublet it? What scan tool do you use, OEM-level or aftermarket? Can you provide pre-repair and post-repair scans as part of the documentation? Do you follow OEM repair procedures or generic ones?

The last question is bigger than it sounds. OEM repair procedures are the manufacturer’s documented, step-by-step instructions for fixing that specific vehicle. Generic procedures are basically what experienced techs have always done. For pre-2010 cars, generic is fine. For modern cars, OEM procedures specify which sensors need calibration, which welds need which equipment, and which adhesives are approved. Skipping the OEM step is how you get a car that looks fixed but technically isn’t.

Documentation Matters For The Long Run

When the work is done, you want paperwork. Pre-repair scan showing what fault codes were active before they started. Post-repair scan showing the codes are cleared. Calibration certificates from whoever did that work, in-house or subcontracted. Photos of any structural repairs.

This isn’t being picky. If the car is in another accident later, if you sell it, or if a warranty issue arises, that documentation establishes what was actually done. A shop that resists handing over paperwork is telling you something about how confident they are. Real shops produce the paperwork without being asked because their process generates it as a normal part of the job.

The car you drive home is a computer with wheels at this point. Treating it like a hunk of sheet metal that just needs paint is how problems get baked in. The shops that do this work properly cost a bit more upfront and save you money and trouble later.

Featured Image Source: https://www.magnific.com/free-photo/car-detailing-concept-man-face-mask-with-orbital-polisher-repair-shop-polishing-roof-orange-suv-car_27418094.htm#fromView=search&page=1&position=0&uuid=528d97c9-0c2b-4722-912b-de818db56100&query=auto+body+shop

General

Overcoming Vertigo with an Expert Chiropractor in Boulder

It’s the feeling that the room is spinning, or the floor is tilting, or that your eyes can’t catch up to your head. The world goes sideways, and the body has no answer. People who get hit with their first real episode often think they’re having a stroke, end up in the ER, and leave with a clean scan and no real explanation.

Most people who book with a chiropractor in Boulder for vertigo have already been around the block. They’ve had MRIs that came back clean and been told it’s probably BPPV. Sometimes the standard repositioning maneuvers solve it. When they don’t, the search continues, and the neck eventually gets a closer look.

By the time someone searches “chiropractor near me” specifically for spinning episodes, they’ve usually figured out that not every chiropractor handles this. Boulder doesn’t have a long list of clinics that specialize in vertigo. There’s Atlas Chiropractic, a few other upper cervical practices, and not much beyond those. The patients who do best tend to find their way to one of the offices that have spent years on this kind of case.

What Is Vertigo

Vertigo is a specific kind of dizziness, not a synonym for it. Lightheadedness or feeling faint isn’t the same thing. The hallmark of vertigo is a false sensation of motion, where the room moves around you, or you feel like you’re moving through space without actually doing anything. 

Doctors usually divide vertigo into two broad camps. Peripheral vertigo comes from the inner ear and is the kind of condition chiropractic care, repositioning maneuvers, and ENT work tend to address. Central vertigo originates in the brain or brainstem and can indicate a serious condition. Sorting which camp an episode belongs in is the first job of any decent assessment, and it’s the reason a careful first visit usually involves a lot more questions than hands-on work.

The Most Common Patterns We See

After ruling out the rare but serious causes, most cases fall into one of a few familiar patterns. What patients say in the first ten minutes of a visit usually points pretty clearly toward one of them.

“It hit me when I rolled over in bed.”

This is the classic BPPV presentation. Loose crystals in the inner ear, called otoconia, shift with head position and send the brain conflicting signals about motion. The spinning is intense but brief, usually lasting 30 seconds or less, and it tends to recur with the same triggering movement until the crystals are repositioned. Standard repositioning maneuvers, such as the Epley, are effective in the majority of cases.

“I just feel off, like the floor isn’t quite there.”

This pattern usually points to cervicogenic dizziness, in which the neck sends faulty positional signals to the brain, and the vestibular system tries to compensate. The sensation is more disorientation than spinning, and it tends to track with neck stiffness, recent stress, or hours hunched at a desk. This one is often what brings people specifically to a chiropractor.

“It started after the car accident, and it just hasn’t gone away.”

Post-traumatic vertigo can come from several sources at once. The inner ear can be damaged in a crash, and the upper cervical area almost always is. Even when scans look clean, subtle restrictions at the top of the spine can keep the nervous system slightly misaligned long after the visible bruising has healed.

Why Upper Cervical Work Helps

The very top of the neck has more nerve endings per square inch than almost anywhere else in the body. These nerve endings, called proprioceptors, tell the brain where the head is in space. When they send accurate signals, balance feels effortless. When they’re sending noise from a stiff joint or irritated ligament, the brain has to compensate, and that compensation often shows up as dizziness or unsteadiness.

That’s why a careful upper cervical adjustment can make a noticeable difference for cervicogenic dizziness and some post-traumatic cases. It is diagnosed, and one consistent theme in the research is that resolving the underlying neck issue often resolves the dizziness as well.

When Vertigo Needs Something Other Than a Chiropractor

If a spinning episode comes with a sudden severe headache, slurred speech, weakness on one side, vision changes, or difficulty walking, get to an emergency room. Not the office, not the chiropractor, not later in the week. The same goes for vertigo paired with hearing loss, ear fullness, or persistent ringing, which may indicate Meniere’s disease and warrant an evaluation by an ENT. A chiropractor is part of the answer for some kinds of vertigo, but not all.

Vertigo has roots in the ear, brain, or neck, and the appropriate treatment depends on its origin. The good news is that most cases aren’t the serious kind. The good news is that diagnosing the root cause of the spinning can take longer than anyone wants. Patience with the process usually pays off more than chasing one fix and giving up when it doesn’t fix everything in a week.

Featured Image Source: https://www.freepik.com/free-photo/young-hispanic-man-suffering-backache-sitting-bed-bedroom_38867862.htm#fromView=search&page=1&position=2&uuid=fef3e977-7533-4f29-a542-dcf703feb21b&query=vertigo

General

Picking the Right Massage Therapy Sessions in Columbus, OH

Walking into a studio and asking for a massage sounds simple until you see the menu. Swedish, deep tissue, sports, shiatsu, reflexology, hot stone, prenatal, couples. Massage therapy sessions in Columbus, OH come in a wide range of formats, and not every style fits every body or every goal.

The wrong message means an hour wasted, plus the cost. Schedule a light Swedish massage when you have been dealing with your tight lower back for weeks on end, but you leave feeling the same. Schedule a deep-tissue massage when all you need is relaxation, but you leave feeling stiff. The massage therapy sessions in Columbus, Ohio, are most effective when they suit your physical needs.

Good news, matching is not that hard once you know what the styles do. This guide breaks down how to pick massage therapy sessions in Columbus, OH, based on your goal, your body, and your schedule.

Start With Your Goal

Asking yourself one question before booking can help you achieve your purpose at the start of your journey.

These are some common answers:

1. Stress relief and relaxation

2. Pain relief in a specific area of the body

3. Muscle recovery after exercising

Depending on which response you choose, the massage therapist will apply a certain technique.

If you’re looking for some rest and peace of mind, Swedish massage therapy, hot stone therapy, or reflexology would be best for you.

Dealing with a stiff neck or a sore lower back? Deep tissue or trigger point work targets the muscle fibers causing the trouble. Pressure is firmer, and the therapist spends more time on one area rather than gliding over the whole body.

Training for something or recovering from a long run? Sports massage mixes stretching, compression, and focused pressure on the muscle groups you use most.

Match the Session Length

Most Columbus studios offer 30, 60, or 90-minute slots.

  • 30 minutes covers one area, like shoulders or feet
  • 60 minutes covers a full body at a normal pace
  • 90 minutes allows for detailed work on two or three problem areas without rushing

If you have never tried bodywork, 60 minutes is a reasonable starting point. Shorter feels rushed. Longer can be overwhelming the first time.

Check Therapist Credentials

Massage therapists must be licensed in Ohio by the State Medical Board. You may ask or check online before your session whether or not the therapist is licensed. The minimum number of training hours for licensed massage therapists is 750 hours.

Many therapists are certified in additional areas, such as prenatal, oncology, or myofascial release. This will become relevant to you if you have certain medical conditions.

Read the Intake Form Carefully

Any legitimate studio asks about:

  • Current injuries or surgeries
  • Pregnancy
  • Medications, especially blood thinners
  • Allergies to oils or lotions
  • Areas you want to avoid.

Filling this out honestly is how the therapist keeps the work safe. Skipping a detail because it feels embarrassing can lead to bruising or worse.

Pressure Preferences

Pressure does not equate with quality. The massage therapist giving a deep tissue massage using medium pressure is likely to do better than another person doing the massage using excessive pressure. Raise concerns at the initial stage and tell the practitioner whether you need light or strong pressure during your massage.

Price and Availability

Prices in Columbus range between $65 and $95 per hour-long massage, but massages like hot stone and couples cost a bit more. Walk-ins and appointments both exist in Columbus; with walk-ins, you have the option of showing up and leaving whenever you please, whereas with appointments, you can make an appointment with a particular masseuse.

The most booked times include weekends and evenings. The least busy periods fall between Tuesdays and Thursdays during the day.

Frequently Asked Questions

How much do massage therapy sessions in Columbus, OH cost?

The standard time frame is $65-$95, while more specialized massages, such as hot stones or couples, will cost you more.

Is an appointment necessary?

You may drop by at any studio; however, a 2-3 day advanced reservation will give you more confidence on weekends and evenings.

Can I choose my therapist?

In most cases, yes, although if you drop by, they will assign you any available therapist.

Is deep tissue suitable for beginners?

Yes, but only if you indicate your pressure preference. On the other hand, Swedish massage is less intense.

Conclusion

Picking massage therapy sessions in Columbus, OH, gets easier once the goal is clear. Match the style to what your body is asking for, pick a session length that fits your schedule, and confirm the therapist holds a current Ohio license. Reviews and service menus fill in the rest.

Featured Image Source: https://www.massage-escape.net/wp-content/uploads/2017/11/service_img2.png

General

First Meeting With a Criminal Defence Lawyer in Toronto

Your first consultation with a criminal defence lawyer in Toronto is a confidential discussion where you tell the lawyer about your situation, and he gives you an honest assessment of your charges and what lies ahead. These consultations last anywhere between 30 and 60 minutes.

What the First Meeting Is For

Your first appointment with a criminal defence lawyer in Toronto may be stressful, especially if you have never met a criminal lawyer. You may not be sure of what to bring or discuss. This should not be the case. The reason for meeting face-to-face is quite clear. The lawyer requires insight into your case. At the same time, you require an opinion as to whether he/she will handle your case effectively.

When you go to see a criminal defence lawyer in Toronto, ensure that you bring all the documents given by the police in relation to your arrest. This may include documents such as your release document, promise to appear, undertaking and bail conditions. Should you be held in custody, you may ask a relative to come with you.

Everything you say at that first meeting is protected by solicitor-client privilege. A criminal defence lawyer in Toronto cannot repeat what you share, even if you do not end up retaining them. That rule exists so you can speak openly. Holding things back usually hurts your defence more than it helps.

What to Expect During the Meeting

The first questions asked by the lawyer would likely be regarding the offence, your next court date, and whether or not you have been given disclosure. Disclosure refers to the Crown’s case and consists of the police notes, witness statements, video evidence, and forensic evidence. In the event that you have not yet obtained disclosure, the lawyer will explain how to obtain it.

Questions the Lawyer May Ask You

The questions are likely to be direct. On what date were you arrested? Who else was present? Did you speak to the police? Did you sign anything? Did you hear your rights being read to you? Have you committed similar offences previously? These may be questions that make you uneasy. However, answer them to the best of your ability since the lawyer is not judging you but merely finding out about your defence options.

Questions You Should Ask

Make a brief checklist before entering. These might be helpful:

  • How many cases like mine have you handled?
  • What are some realistic results I can expect from this charge?
  • Are you planning to be there at the hearing or would someone else handle the days?
  • Do you charge a block fee or an hourly rate?
  • What happens next if I retain you today?

Fees and Retainers

Fees for a criminal defence lawyer in Toronto vary based on the charge, the complexity, and the lawyer’s years in practice. A simple summary matter may run on a flat block fee. An indictable charge with a trial costs more. Ask for a written retainer agreement before you pay anything. If money is tight, ask whether the lawyer accepts Legal Aid Ontario certificates.

Bail and Court Dates

Bring a copy of the terms and conditions of your bail order. You will face another offence if you miss curfew, consume alcohol when not supposed to do so, or communicate with the specified person. Your lawyer will go through the terms and conditions to identify any areas requiring clarification in court.

Do not try to contact complainants or witnesses. Do not mention the matter on social media. Avoid making statements to the police without your lawyer present.

Frequently Asked Questions

How long does the initial consultation generally take? 

Most consultations generally last 30 to 60 minutes; however, cases involving more serious allegations may require more time.

Will there be any cost associated with the initial consultation? 

Many lawyers in Toronto provide free consultations, although some may charge a fixed fee.

Can anyone accompany me? 

While yes, keep in mind that statements made in the presence of a third party might not be privileged.

What if I cannot afford a lawyer? 

You can apply to Legal Aid Ontario or speak with duty counsel at the courthouse on your court date.

When Should I Schedule the Appointment?

It is best to schedule the appointment as early as you can after charges have been filed, preferably before your first court date.

Conclusion

A first consultation is a critical moment in your case. It helps you understand the charges against you, the legal process involved, and your options. Be sure to take notes, ask meaningful questions, and take your time when deciding whether to hire.

Featured Image Source: https://media.istockphoto.com/id/2215588621/photo/concept-of-justice-law-and-legal-system.jpg?b=1&s=612×612&w=0&k=20&c=WNdnUpHehnBuCryqSqKY6TlLOXRnqPxcQ0dFUA9pjzI= 

General

How Drug and Alcohol Addiction Affects Families, and What You Can Do About It

Drug and alcohol addiction does not happen to one person alone. It reaches into the entire family. Parents, spouses, siblings and children all feel the weight of a loved one’s substance use, often in ways that are exhausting, confusing and deeply painful. If your family is going through this, you are not alone.

When drug and alcohol addiction takes hold, it reshapes the dynamics inside a household. Routines fall apart. Trust breaks down. Conversations become arguments. Family members may find themselves constantly worried, covering up for the person, or walking on eggshells to avoid conflict. Over time, the emotional toll can be just as severe for the family as it is for the person using substances.

One of the hardest parts of living with drug and alcohol addiction in the family is the uncertainty. You may not know whether your loved one is getting better or worse. You may swing between hope and frustration several times in a single week. This emotional rollercoaster is a common experience, and it is a sign that the whole family, not just the individual, needs support.

Recognising the Signs That a Loved One Needs Help

Families in India often notice changes long before they name the problem. Your loved one may be drinking more than usual, missing work, becoming secretive about money, withdrawing from social events or showing sudden mood swings. Physical signs might include weight changes, bloodshot eyes, poor hygiene or disturbed sleep.

It is common for families to explain these signs away, “he’s just stressed,” or “she’ll stop on her own.” But early recognition and action can prevent the situation from becoming a medical emergency.

Supporting Without Enabling

There is a fine line between supporting a loved one and enabling their substance use. Enabling means doing things that make it easier for the person to continue using, covering their responsibilities, lending money without questions, or making excuses on their behalf.

Genuine support looks different. It means having honest, calm conversations about what you have observed. It means setting clear boundaries, for example, refusing to cover for missed commitments. And it means encouraging your loved one to seek professional help rather than trying to manage the problem within the family.

How Family Counselling Helps

Many residential rehabilitation centres in Mumbai and Thane offer family counselling as part of their treatment programmes. These sessions help family members understand addiction as a health condition, learn healthier communication patterns and begin to heal from the emotional strain they have been carrying.

Family therapy also helps the person in recovery. Knowing that their family understands the condition and is willing to engage in the process can be a powerful source of motivation.

Looking After Yourself as a Caregiver

Caring for someone with addiction is draining. Many family members neglect their own health, sleep and social lives in the process. It is important to remember that you cannot support someone else if you are running on empty. Seek your own counselling if needed, lean on trusted friends and set aside time for activities that restore your energy.

Frequently Asked Questions

Should I confront my loved one about their addiction?

A calm, private conversation expressing concern is more effective than a confrontation. Focus on specific behaviours you have noticed rather than making accusations or using labels.

Is it my fault that my family member became addicted?

No. Addiction is caused by a combination of genetic, psychological and environmental factors. No single person causes another’s addiction.

When should a family consider professional rehab for a loved one?

If the person has tried to quit on their own and relapsed, if their health or safety is at risk, or if the family situation has become unmanageable, it is time to consult a qualified de-addiction centre.

Can family members attend therapy sessions during rehab?

Yes. Many inpatient rehabilitation centres include scheduled family counselling sessions as part of the treatment programme. These sessions are designed to support both the individual and the family.

Conclusion

Drug and alcohol addiction affects the whole family, but recovery can involve the whole family too. By seeking the right support, setting healthy boundaries and taking care of your own wellbeing, you can play a meaningful role in your loved one’s recovery. If your family is struggling, consider reaching out to a registered rehabilitation centre or mental health professional in Mumbai or Thane for guidance.Disclaimer: This article is for informational purposes only and is not a substitute for professional medical advice. Please consult a qualified doctor or psychiatrist for personalised guidance.


Featured Image Source: https://elitefoundation.co.in/wp-content/uploads/2025/09/IMG-20250907-WA0018.jpg

General

Can a Northridge Optometrist Detect More Than Just Poor Vision?

Many people think eye exams are just about updating their glasses prescription. They schedule appointments when their vision gets blurry or they can’t read street signs clearly anymore. This mindset treats eye care like changing windshield wipers—something you do when performance obviously declines.

The reality is far different. Modern optometrists function as front-line health detectors, spotting serious conditions that have nothing to do with whether you can see the bottom line on an eye chart. Your eyes reveal information about your cardiovascular system, blood sugar levels, autoimmune conditions, and neurological health. A Northridge optometrist might be the first healthcare provider to catch signs of diabetes, high blood pressure, or even brain tumors during what you thought was a routine vision check.

This broader role of eye care often surprises patients. But once you understand what comprehensive eye exams can detect, you’ll never think of them the same way again.

The Hidden Role of Comprehensive Eye Exams

Your eyes provide a unique window into your overall health. They’re the only place in your body where blood vessels can be viewed directly without surgical procedures. This gives optometrists access to information that other healthcare providers can only guess at through indirect testing.

The difference between a basic vision screening and a comprehensive eye exam is like comparing a quick temperature check to a full physical. Vision screenings test whether you can see letters clearly at various distances. Comprehensive exams examine the entire eye structure, blood vessels, optic nerves, and surrounding tissues for signs of disease or damage.

Many patients say they don’t need regular eye exams because they “see fine.” This thinking misses the point entirely. Most serious eye conditions and systemic health problems develop without affecting your vision until they reach advanced stages. By the time you notice vision changes, permanent damage may have already occurred.

Think about glaucoma, which affects over 3 million Americans. This condition gradually destroys peripheral vision, but people adapt to the changes without realizing what’s happening. You might drive perfectly well and read comfortably while losing significant amounts of your visual field.

The same applies to systemic health conditions visible through the eyes. Diabetic retinopathy can develop and progress while your vision remains crystal clear. High blood pressure might be damaging retinal blood vessels long before you feel any symptoms elsewhere in your body.

Regular comprehensive exams catch these problems during their treatable stages. Early detection often means the difference between manageable conditions and life-altering complications.

Early Detection of Eye Diseases

Eye diseases rarely announce themselves with obvious symptoms. They creep up silently, often causing irreversible damage before patients realize something’s wrong.

Glaucoma earned the nickname “silent thief of sight” for good reason. This condition increases pressure inside the eye, gradually damaging the optic nerve. Most people don’t notice the peripheral vision loss until they’ve lost a significant visual field. Once glaucoma damage occurs, it’s permanent. But when caught early through pressure testing and optic nerve evaluation, treatments can slow or stop progression.

Cataracts develop so gradually that people adjust to the changes without noticing. You might think you just need stronger reading glasses or better lighting. Professional examination can detect cataracts years before they significantly impact daily activities, allowing for better surgical timing when treatment becomes necessary.

Macular degeneration affects central vision, making reading and detail work difficult. The dry form progresses slowly, while the wet form can cause rapid vision loss. Regular retinal examinations can spot early signs and recommend treatments that preserve vision.

Perhaps more concerning are the conditions that cause sudden vision loss without warning. Retinal detachment, blood vessel blockages, and acute glaucoma can destroy vision within hours or days. People who maintain regular eye care relationships get faster emergency treatment when these urgent situations develop.

Modern diagnostic technology makes early detection more accurate and less invasive than ever before. Digital retinal photography documents changes over time that might otherwise go unnoticed. Optical coherence tomography creates detailed cross-sections of retinal layers, revealing microscopic changes years before they affect vision.

The key point is that waiting for symptoms often means waiting too long. Regular professional monitoring catches problems during their most treatable phases.

Why Choose a Northridge Optometrist for Preventive Care

Local optometrists offer advantages that large chains and distant specialists can’t match. They understand the specific health challenges common in your community and can provide personalized care based on long-term relationships with patients and families.

Preventive eye care requires consistency over time. Changes in eye health often develop gradually, making year-to-year comparisons essential for accurate diagnosis. Local optometrists maintain detailed records and can spot subtle changes that might be missed during one-time examinations.

The personal relationships that develop with local eye care providers benefit both routine care and emergency situations. When urgent problems develop, patients who have established relationships typically receive faster attention and more coordinated care.

Local practices often invest in advanced diagnostic equipment while maintaining the personal attention that larger operations can’t provide. You get access to modern technology combined with individualized care and thorough examinations.

Your Health Picture Starts With Your Eyes

Eye exams reveal far more than whether you need glasses or contact lenses. They provide early warnings about serious health conditions, support children’s learning and development, and offer a unique window into your overall wellbeing.

The value of comprehensive eye care extends beyond vision correction to encompass whole-body health monitoring. Early detection through routine eye examinations can prevent serious complications and preserve both sight and general health.

Don’t wait for vision problems or health symptoms to develop. Regular comprehensive eye care provides the foundation for maintaining both clear sight and optimal health throughout your life.

Schedule a comprehensive exam with a Northridge optometrist and see the bigger picture of your health.

Frequently Asked Questions

Can an optometrist detect diabetes during an eye exam?

Yes, optometrists can often detect diabetes through changes in retinal blood vessels called diabetic retinopathy. These changes sometimes appear before patients develop other diabetes symptoms, making eye exams valuable screening tools for this serious condition.

How often should I see a Northridge optometrist if I don’t have vision problems?

Adults should have comprehensive eye exams every 1-2 years depending on age and risk factors. Even people with perfect vision need regular monitoring because many serious eye conditions and health problems develop without causing vision changes initially.

What’s the difference between a vision screening and a comprehensive exam?

Vision screenings test basic sight abilities like reading letters on a chart. Comprehensive exams evaluate the entire eye structure, blood vessels, and surrounding tissues for signs of disease. Screenings might miss many serious conditions that comprehensive exams detect early.

Can eye exams help detect high blood pressure?

Eye exams can reveal changes in retinal blood vessels that indicate high blood pressure. These findings sometimes show up before patients develop obvious hypertension symptoms elsewhere, making eye care an important part of overall health monitoring.

At what age should children start seeing an optometrist?

Children should have their first comprehensive eye exam around age 1, another before starting school, and regular exams every 1-2 years throughout childhood. Early detection of vision problems is crucial for proper learning and development.

General

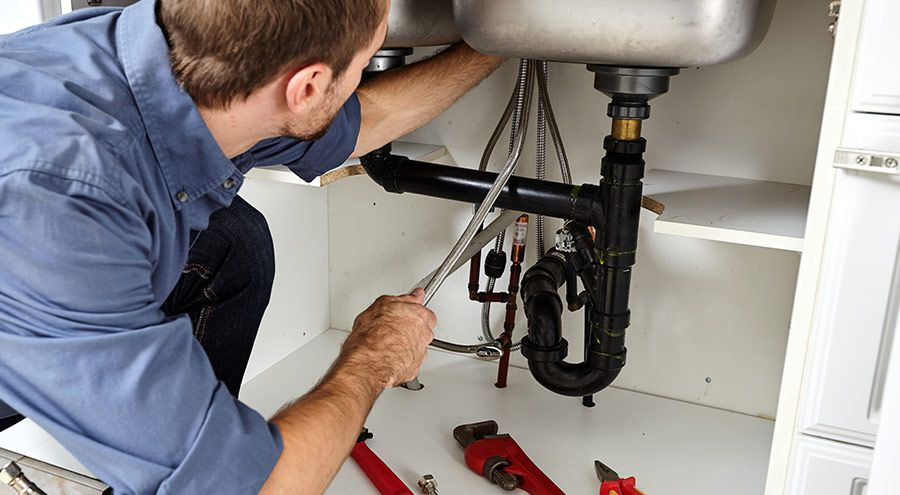
Why Emergency Plumbing Services Are Worth Every Penny

Picture this: You’re hosting Thanksgiving dinner. Thirty relatives are coming over in two hours. You walk into the guest bathroom and step into two inches of water. The toilet is overflowing, and dark water is seeping under the door into the hallway carpet.

Your heart races. Panic sets in. You grab towels, but the water keeps coming. The smell hits you next. This isn’t just an inconvenience—it’s a disaster waiting to happen.

These moments reveal something important about plumbing emergencies. They don’t wait for convenient timing. They strike when you least expect them, often causing maximum disruption. The question isn’t whether you’ll face a plumbing crisis. It’s whether you’ll be prepared when it happens.

Many homeowners hesitate to call emergency plumbing services because of the cost. That hesitation can be the most expensive mistake you’ll ever make.

Immediate Response Prevents Costly Damage

Water moves fast. Really fast.

A burst pipe can dump hundreds of gallons into your home within hours. That water doesn’t just sit there politely waiting for Monday morning. It seeps into floors, climbs up walls, and finds its way into places you never knew existed.

The Centers for Disease Control and Prevention estimate that mold can begin growing within 24 to 48 hours of water exposure. Once mold takes hold, you’re looking at remediation costs that can easily reach $15,000 to $30,000. Compare that to a typical emergency plumber call, which might run $200 to $500.

Expertise You Can Trust When It Matters Most

When your kitchen is flooding at 2 AM, you need more than a YouTube tutorial and good intentions.

Licensed emergency plumbers carry diagnostic tools that most homeowners don’t even know exist. Thermal imaging cameras can locate hidden leaks behind walls. Pipe inspection cameras can identify blockages deep in your sewer line. Pressure testing equipment can pinpoint weak spots before they become catastrophic failures.

DIY repairs during emergencies often make things worse. You might stop the immediate water flow, but create a bigger problem that will surface later. A homeowner in Douglasville thought he fixed a burst pipe with a hardware store coupling. The repair lasted for three weeks, then failed while he was on vacation. His neighbor discovered the flood two days later.

Professional plumbers also understand building codes and permit requirements. Some emergency repairs require permits and inspections. Doing it wrong can create legal headaches when you try to sell your home.

Availability Around the Clock

Plumbing emergencies don’t respect business hours. They seem to prefer weekends, holidays, and the middle of the night.

Can you really put a price on peace of mind at 3 AM?

This availability extends beyond just fixing problems. Emergency plumbers can often provide guidance over the phone while you wait for their arrival. They’ll walk you through shutting off water mains, containing leaks, or clearing minor blockages. This phone support alone can prevent thousands in damage.

Emergency services eliminate that terrible waiting period. Professional help arrives when you need it, not when it’s convenient for someone else’s schedule.

Protecting Your Health and Safety

Some plumbing emergencies create genuine health hazards that go far beyond property damage.

Sewage backups expose your family to dangerous bacteria like E. coli and salmonella. These pathogens can cause serious illness, especially in children and elderly family members. Professional plumbers have the protective equipment and cleaning protocols to handle contaminated water safely.

Water heater failures can release scalding water or dangerous gases. Electric water heaters can create electrocution hazards when they leak. Gas water heaters can produce carbon monoxide if they malfunction.

Emergency plumbers handle these dangerous scenarios regularly:

  • Sewage line backups and overflows
  • Gas line leaks and repairs
  • Hot water heater explosions or failures
  • Frozen pipes that create flooding
  • Main water line breaks
  • Sump pump failures during storms

Regular plumbers might schedule these jobs for next week. Emergency professionals understand that some problems can’t wait without risking your family’s safety.

They also carry safety equipment that most homeowners lack. Gas detection meters, protective suits for sewage work, and specialized ventilation equipment come standard in their trucks.

Your family’s health and safety shouldn’t depend on waiting for convenient business hours.

The Real Value Calculation

Emergency plumbing services cost more per hour than regular plumbing. That’s not a secret, and it’s not price gouging. It’s simple economics.

Emergency plumbers maintain 24-hour availability. They keep fully stocked trucks ready to roll. They sacrifice personal time to be available when you need help most. They invest in specialized equipment and ongoing training. They carry higher insurance costs because emergency work involves greater risks.

All of those factors increase their operating costs, which get reflected in higher hourly rates.

But here’s what most people miss: emergency plumbers often solve problems faster than regular plumbers. They’re focused on getting your emergency resolved quickly so they can respond to the next call. Their experience with crisis situations means they diagnose problems faster and carry the right parts on their truck.

A regular plumber might make three trips to complete a repair. An emergency plumber typically finishes the job in one visit. When you factor in time savings and prevented damage, emergency services often cost less than the alternatives.

The true value isn’t just financial. It’s about getting your life back to normal as quickly as possible. It’s about sleeping soundly knowing the problem is properly fixed. It’s about protecting your largest investment—your home.

Don’t Wait for Disaster

Emergency plumbing services represent one of the best insurance policies you can buy. The peace of mind alone justifies the cost, but the potential savings in prevented damage make it a smart financial decision.

Don’t wait for disaster to strike. Find a trusted emergency plumber today, before you’re standing in water at midnight wondering why you waited so long to prepare.


Frequently Asked Questions

What qualifies as a plumbing emergency?

Any plumbing problem that poses immediate risk to your property, health, or safety qualifies as an emergency. This includes burst pipes, sewage backups, gas leaks, major water leaks, frozen pipes causing flooding, or complete loss of hot water during winter months. When in doubt, it’s better to call and ask than to wait and regret it.

Are emergency plumbing services more expensive?

Yes, emergency plumbing typically costs more per hour than regular service calls. Emergency rates usually run 1.5 to 2 times normal rates, with additional charges for after-hours, weekend, or holiday service. But emergency plumbers often complete repairs faster and prevent costly damage that makes the higher hourly rate worthwhile.

How do I find a reliable emergency plumber near me?

Research emergency plumbers before you need them. Look for licensed, insured companies with strong local reviews and 24-hour availability. Ask neighbors and friends for recommendations. Verify that they offer true emergency service, not just “emergency scheduling” during business hours. Keep their contact information readily available.

Can insurance cover emergency plumbing costs?

Most homeowners insurance policies cover damage caused by sudden plumbing failures, but they typically don’t cover the plumbing repair itself. Some policies include coverage for emergency service calls if the problem creates covered damage. Review your specific policy and consider adding service line coverage if it’s available in your area.

General

What’s the Best Way to Unclog a Drain in North Bay

Water is pooling in your sink. Again. You watch it slowly spiral down the drain, taking forever to disappear completely. The frustration builds as you realize this problem isn’t going away on its own.

Most people reach for chemical drain cleaners first, thinking they’ll save money and solve the problem quickly. Professional plumbers like those at Providence Plumbing see the aftermath of this approach regularly – damaged pipes, worsened blockages, and homeowners who end up paying far more for repairs than they would have spent on proper solutions from the start.

The truth is that the “best” way to unclog your drain depends entirely on what’s causing the blockage and how severe the problem has become.

Start with the Simplest Solutions First

Hot water works for many minor clogs, especially those caused by soap buildup or light grease accumulation. Run the hottest water your tap produces for several minutes. The heat softens materials that might be partially blocking your drain.

This method costs nothing and poses no risk to your pipes. You might be surprised how often hot water alone clears slow-draining sinks and tubs. The key is using truly hot water, not just warm water that feels comfortable to touch.

Some people add dish soap to the hot water treatment. The soap helps break down grease and organic matter that might be coating your pipe walls. Pour a generous amount of liquid dish soap down the drain, then follow with hot water for five to ten minutes.

Physical Removal Beats Chemical Attacks

Manual drain snakes remove blockages that hot water can’t touch. These tools physically break up hair clogs, food particles, and other debris that creates solid barriers in your pipes.

Basic hand-crank drain snakes cost $15 to $30 at hardware stores. They work well for bathroom sinks and tubs where hair is the main culprit. The snake grabs onto hair masses and pulls them out of your drain.

Electric drain snakes handle tougher blockages but require more skill to operate safely. These tools can damage pipes if used incorrectly. Perhaps it’s worth renting one for major clogs, but consider the learning curve before attempting to use professional equipment yourself.

The plunger is another physical removal tool that many people overlook for sink drains. A small cup plunger designed for sinks can create enough pressure to dislodge minor blockages. Make sure you cover overflow openings to create proper suction.

Why Chemical Cleaners Usually Make Things Worse

Chemical drain cleaners promise easy solutions but often create bigger problems. The harsh acids and bases in these products generate extreme heat that can damage pipe materials, especially in older North Bay homes with aging plumbing systems.

These chemicals rarely remove the entire blockage. They might create small channels through clogs, allowing water to drain temporarily. The main obstruction remains in place, ready to catch new debris and reform the blockage within days or weeks.

Hair clogs resist chemical treatment completely. The protein structure of hair doesn’t dissolve in most commercial drain cleaners. You end up with partially dissolved organic matter mixed with intact hair – a messier blockage than you started with.

Mixing different chemical products creates dangerous reactions. People often try one brand, then switch to another when the first doesn’t work. The combination can produce toxic gases or explosive reactions inside your plumbing system.

When DIY Methods Stop Working

Recurring clogs in the same drain signal deeper problems that simple home remedies can’t address. If you’re dealing with blockages every few weeks, something more serious is happening in your plumbing system.

Multiple drains backing up simultaneously indicates main sewer line problems. Tree roots, collapsed pipes, or major blockages in your main line require professional equipment and expertise. Home remedies won’t touch these issues.

Sewage odors coming from drains suggest venting problems or sewer line issues that pose health risks. These situations require immediate professional attention. Don’t try to solve them with store-bought products or basic tools.

Water backing up into other fixtures when you use certain drains points to complex plumbing problems. If your toilet gurgles when you drain the bathtub, or your sink backs up when you run the washing machine, you need professional diagnosis and repair.

Professional Equipment Makes the Real Difference

Video inspection cameras show exactly what’s blocking your drains and where the problems are located. This technology eliminates guesswork and prevents unnecessary pipe damage from blind attempts at clearing blockages.

Hydro-jetting equipment uses high-pressure water to scour pipe walls completely clean. This process removes years of buildup and restores full drain capacity. The results last much longer than simple snaking or chemical treatments.

Professional drain snakes with cutting attachments can handle tree roots and solid obstructions that defeat home equipment. These tools require training and experience to operate safely, but they solve problems that nothing else can touch.

Locating equipment helps professionals find buried pipes and identify problem areas without tearing up your property. This technology saves time and money while minimizing disruption to your landscaping and hardscaping.

Understanding What’s Really Causing Your Blockages

Kitchen drains usually clog from grease, food particles, and soap buildup. Grease solidifies as it cools, creating hard barriers that trap other debris. Even small amounts of cooking oil can cause problems over time.

Bathroom drains battle hair, soap scum, and personal care products. Long hair creates tangled masses that catch everything else flowing down the drain. Soap residue coats pipe walls and narrows the effective drain diameter.

Laundry room drains deal with lint, soap, and sometimes small items that fall out of pockets. Front-loading washers produce more lint than top-loaders, creating unique drainage challenges.

Floor drains in basements collect dust, debris, and sometimes tree leaves that blow in during storms. These drains often go months without use, allowing debris to accumulate undisturbed.

The Hidden Costs of Wrong Approaches

Chemical drain cleaners cost $5 to $15 per bottle and provide temporary relief at best. Regular use adds up to hundreds of dollars annually while gradually damaging your plumbing system.

Pipe replacement costs thousands when chemical damage requires major repairs. The long-term pipe damage from harsh cleaners creates expenses that dwarf the cost of proper maintenance.

Water damage from failed DIY attempts can cost $5,000 to $25,000 in repairs and restoration. Pushing blockages deeper into your system or damaging pipe connections creates flooding risks that insurance might not cover.

Emergency service calls cost twice as much as scheduled maintenance. When DIY methods fail and you need immediate help, you’ll pay premium rates for urgent plumbing service.

Smart Prevention Saves Money and Hassle

Use drain screens to catch hair and debris before they enter your plumbing system. These simple devices cost a few dollars and prevent most common blockages from forming.

Dispose of grease properly instead of pouring it down kitchen drains. Let cooking oils cool and solidify, then scrape them into the trash. Even small amounts of grease cause problems over time.

Run hot water after each use to help clear minor buildup before it becomes problematic. This simple habit extends the time between professional cleanings and keeps your drains flowing smoothly.

Schedule professional drain cleaning before you have problems. Annual or biannual maintenance costs less than emergency repairs and prevents most serious drainage issues.

Knowing When to Call for Help

Don’t wait until drains stop working completely. Slow drainage that persists despite home remedies indicates developing problems that will only get worse.

Strange sounds from drains suggest venting issues or partial blockages that need professional attention. Gurgling, bubbling, or sucking sounds aren’t normal and point to plumbing problems.

Multiple fixture backups require immediate professional diagnosis. These situations can quickly escalate to sewage flooding if not addressed properly.

Foul odors that persist after cleaning efforts indicate serious blockages or sewer line problems. These issues pose health risks and require professional equipment to resolve safely.

The best way to unclog a drain is the method that actually removes the blockage permanently without damaging your plumbing system. Sometimes that’s hot water and patience. Often it requires professional equipment and expertise.

Choose your approach based on the severity of your problem and your willingness to risk making things worse. The temporary savings from DIY attempts often cost much more in the long run.

Featured Image Source: https://pixabay.com/photos/plumbing-industry-pipes-pipelines-1103725

General

What’s the Difference Between Water Purification and Filtration?

Most people think filtration and purification mean the same thing. This confusion costs families their health every single day. Your child drinks what looks like clean water, but microscopic threats slip through basic filters undetected. The difference between these two approaches could mean the difference between safe water and a medical emergency.

The Water Guys North encounters this misunderstanding constantly. Homeowners install expensive filtration systems thinking they’re protected, only to discover later that dangerous contaminants are still flowing from their taps. The terms get thrown around interchangeably by salespeople who either don’t know better or don’t care about your family’s safety.

Understanding what each method actually does helps you make the right choice for your home. The stakes are too high to guess wrong.

What Water Filtration Actually Does

Filtration removes specific contaminants through physical barriers or chemical attraction. Think of it as screening out the bad stuff while letting water molecules pass through.

Most filtration systems use one or two methods. Activated carbon grabs chlorine, some chemicals, and bad tastes. Sediment filters catch dirt, rust, and larger particles you can sometimes see floating in your water.

These systems work well for their intended purpose. Carbon filters make water taste better and remove that swimming pool smell from chlorinated municipal supplies. Sediment filters prevent your appliances from clogging with particles and keep your water looking crystal clear.

But filtration has limits that manufacturers don’t always explain clearly.

What Gets Through

Bacteria often slip past standard filtration systems. The pores in most filters are too large to catch single-celled organisms. A family in Michigan discovered this the hard way when their expensive carbon filter failed to remove E. coli from their well water. Three family members ended up hospitalized.

Viruses are even smaller than bacteria. Most filtration systems can’t touch them at all. The hepatitis A outbreak in San Diego traced back to contaminated water that had passed through multiple filtration stages.

Many dissolved chemicals pass right through carbon filters. Fluoride flows through unchanged. Nitrates from agricultural runoff continue into your glass. Heavy metals like lead sometimes get reduced but not eliminated.

The timing matters too. Fresh carbon filters work better than old ones, but there’s no warning when effectiveness drops off. The water tastes the same whether your filter is protecting you or just giving you false confidence.

How Water Purification Works Differently

Purification aims to eliminate virtually all contaminants, not just reduce them. The goal is water that’s as close to pure H2O as possible.

Reverse osmosis pushes water through membranes with pores so small that only water molecules can squeeze through. Everything else gets flushed away. Bacteria, viruses, dissolved chemicals, heavy metals – they all get rejected by the membrane.

Distillation boils water and captures the steam. Contaminants with higher boiling points get left behind in the original container. The pure steam condenses back into clean water.

UV purification destroys microorganisms by damaging their DNA with ultraviolet light. The organisms can’t reproduce or cause infection after exposure.

These methods don’t just reduce contaminants like filtration does. They eliminate them almost completely.

The Purification Advantage

Purified water protects against threats that filtration misses. That microscopic parasite that survived your carbon filter gets destroyed by UV light. The lead that partially passed through your sediment filter gets completely removed by reverse osmosis.

Purification systems often combine technologies for broader protection. A quality reverse osmosis system might include carbon pre-filters, the RO membrane, and UV sterilization. Each stage handles different types of contaminants.

The redundancy provides peace of mind. If one stage fails or becomes less effective, other stages continue protecting your family.

Why the Distinction Matters for Your Health

Your immune system can handle small amounts of many contaminants. The problem comes with long-term exposure or high concentrations that overwhelm your body’s defenses.

Filtration might reduce contaminant levels from dangerous to merely concerning. That’s better than nothing, but perhaps not good enough for vulnerable family members. Young children, pregnant women, and elderly relatives need the highest level of protection possible.

Some contaminants cause immediate illness. Others build up in your body over years before symptoms appear. Lead poisoning develops slowly. You might not notice cognitive effects until permanent damage has occurred.

Real-World Examples

A daycare center in Ohio used expensive carbon filters on their water supply. Parents felt confident their children were protected. Routine testing revealed high levels of bacteria that the filters couldn’t handle. Several children developed severe gastroenteritis before the problem was discovered.

On the flip side, a family with a compromised immune system member installed a complete purification system after their doctor’s recommendation. When neighbors got sick from contaminated well water during a drought, their family stayed healthy despite using the same aquifer.

The difference wasn’t luck. It was the level of treatment their water received.

Cost Considerations That Matter

Filtration systems cost less upfront but might end up being more expensive over time. Frequent filter replacements add up quickly, especially if you use a lot of water. A family of four might spend $300 yearly just on replacement cartridges.

Purification systems require a bigger initial investment but often have lower ongoing costs. Reverse osmosis membranes last 2-3 years. UV bulbs need annual replacement but cost less than monthly filter changes.

The hidden costs matter too. Medical bills from waterborne illness can be enormous. A single hospital stay costs more than the most expensive purification system.

Your time has value as well. Constantly buying and changing filters takes effort. Purification systems typically require less frequent maintenance.

When Filtration Makes Sense

Basic filtration works fine if your water quality is already good and you mainly want to improve taste and odor. Municipal water that meets safety standards might only need carbon filtration to remove chlorine taste.

Simple problems need simple solutions. If your main issue is sediment from old pipes, a sediment filter solves the problem without overkill.

Budget constraints sometimes make filtration the only realistic option. A basic carbon filter provides some protection, which is better than no protection at all.

When You Need Purification

Well water almost always benefits from purification rather than just filtration. You can’t predict what contaminants might be present, and the consequences of guessing wrong are severe.

Families with health concerns should lean toward purification. Pregnancy, autoimmune conditions, or caring for elderly relatives all increase the stakes of water quality decisions.

Areas with known contamination issues need the most complete protection possible. If your neighbors have had water problems, assume your supply could be affected too.

The peace of mind factor weighs heavily for many families. Knowing that virtually all contaminants have been removed allows you to stop worrying about every glass of water your child drinks.

Making the Right Choice

Water testing provides the foundation for smart decisions. You can’t choose between filtration and purification without knowing what’s actually in your water supply.

Municipal water reports give you a starting point, but they don’t reflect conditions in your home’s plumbing. Well water testing is even more critical since there’s no treatment before it reaches your tap.

Consider your family’s specific needs and risk tolerance. The cheapest option isn’t always the best value when health is on the line.

Think about the long-term picture too. Water quality can change over time due to infrastructure problems, environmental contamination, or seasonal variations. A system that handles today’s problems might not protect against tomorrow’s threats.

The choice between filtration and purification isn’t just about water quality. It’s about the level of protection you want for everything that matters most to you. Your family deserves water you can trust completely, not water that’s just “probably safe enough.”

Featured Image Source: https://pixabay.com/photos/water-glass-liquid-wet-refreshment-3853492

General

Is Your Website Mobile-Friendly Enough for Canadian Users?

Picture this: A potential customer searches for your business on their phone. They click on your website link, but everything loads tiny and squished. They try to zoom in, accidentally click the wrong button, get frustrated, and leave. Just like that, you’ve lost a customer – all because your website wasn’t mobile-friendly.

This happens more often than most business owners realize. In a recent case study, Northern Computer Services worked with a small Toronto retail shop whose owner was mystified by their high bounce rate. When they examined the data, they discovered that 67% of mobile visitors were leaving the site within 10 seconds. The culprit? A website that was practically unusable on phones.

The Canadian Mobile Reality

Let’s look at some eye-opening numbers:

  • Over 90% of Canadians own a smartphone
  • Canadians spend an average of 4.2 hours per day on mobile devices
  • More than 55% of web traffic in Canada now comes from mobile devices
  • 61% of users won’t return to a website they had trouble accessing on their phone
  • 40% will visit a competitor’s site instead

These stats paint a clear picture: if your website doesn’t work well on mobile, you’re losing customers every single day.

Beyond Just Looking Good

Many business owners think a mobile-friendly website just means it looks okay on a small screen. That’s part of it, but there’s so much more. A truly mobile-friendly website addresses:

  • Touch navigation (fingers are less precise than mouse pointers)
  • Loading speed (mobile users often have slower connections)
  • Button and link size (tiny buttons frustrate users)
  • Form usability (nobody wants to fill out complex forms on a phone)
  • Text readability without zooming
  • Menu accessibility

Each of these elements affects whether someone stays on your site or leaves in frustration.

The Google Factor

Google knows that mobile browsing dominates, which is why they’ve shifted to “mobile-first indexing.” This means they primarily use the mobile version of your website to determine your search rankings.

If your site isn’t mobile-friendly, you’re not just losing visitors who find you – you’re being shown to fewer people in the first place. It’s a double penalty that can devastate your online visibility.

This matters especially for local searches, which are often done on-the-go. When someone searches for “restaurants near me” or “plumber in Calgary,” mobile-friendly websites get priority in the results.

What Makes Canadians Different?

Canadian mobile users have some unique characteristics worth noting:

  • Higher-than-average data costs make loading speed even more critical
  • Extreme weather conditions mean more browsing from indoor locations
  • Bilingual requirements add complexity to mobile layouts
  • Seasonal tourism creates spikes in mobile searches from international visitors

These factors mean that mobile-friendliness for Canadian websites might require special considerations beyond the global standards.

Testing Your Mobile-Friendliness

Not sure if your website makes the grade? Here are some simple tests you can try right now:

  1. Pull up your website on your phone. Can you read everything without zooming?
  2. Try clicking on links and buttons. Are they easy to tap with your finger?
  3. Fill out a contact form. Is it frustrating or simple?
  4. Time how long your site takes to load on mobile data (not Wi-Fi)
  5. Try navigating to key information. How many taps does it take?

If you noticed problems with any of these tests, your site probably isn’t as mobile-friendly as it should be.

For a more technical assessment, try Google’s Mobile-Friendly Test tool. It provides specific feedback about issues that might be hurting your mobile usability.

The Business Impact of Poor Mobile Design

The consequences of a non-mobile-friendly website go beyond just annoying your visitors:

  • Higher bounce rates (people leaving immediately)
  • Lower time on site
  • Fewer page views per visit
  • Reduced conversions (calls, form submissions, purchases)
  • Damaged brand perception
  • Lower search rankings

Each of these metrics translates directly to lost business opportunities. When someone leaves your site in frustration, they rarely come back for a second try.

Mobile Page Speed: The Hidden Killer

One aspect of mobile-friendliness that often gets overlooked is loading speed. Mobile users are notoriously impatient – studies show that 53% will leave a site that takes longer than 3 seconds to load.

Many websites that look fine on mobile still fail this critical test. Large images, unnecessary scripts, and bloated code can all contribute to slow loading times.

Improving your mobile page speed often leads to dramatic improvements in user engagement and conversions. Even a one-second improvement can increase conversions by 7%.

Responsive vs. Mobile-Specific: What’s the Difference?

There are two main approaches to mobile-friendly design:

  • Responsive design: One website that adjusts automatically to different screen sizes
  • Mobile-specific sites: Separate versions of your website for mobile and desktop users

For most Canadian businesses, responsive design makes more sense. It’s easier to maintain, more cost-effective, and tends to perform better in search results.

That said, some businesses with very specific mobile use cases might benefit from a dedicated mobile site. It depends on your particular situation and user needs.

Common Mobile-Friendly Mistakes

Even websites that were designed to be “mobile-friendly” often contain these common mistakes:

  • Font sizes too small for comfortable reading
  • Clickable elements placed too close together
  • Important content hidden behind dropdown menus
  • Forms requiring too much typing
  • Unplayable videos or unusable features
  • Pop-ups that are difficult to close on mobile

Fixing these issues can lead to immediate improvements in how users interact with your site.

The Cost of Updating vs. The Cost of Waiting

Many business owners put off making their websites mobile-friendly because they worry about the cost. This short-term thinking often backfires.

The truth is, having a website that isn’t mobile-friendly is already costing you money through:

  • Lost customers who get frustrated and leave
  • Wasted marketing budget driving traffic to a site that drives people away
  • Lower search rankings requiring more spending on paid ads
  • Damage to your brand’s reputation

For most businesses, the return on investment for mobile optimization comes quickly – often within months.

Taking Action: Next Steps

If you’ve realized your website isn’t as mobile-friendly as it should be, what can you do?

  1. Start with a mobile usability audit to identify specific problems
  2. Prioritize fixes based on impact and difficulty
  3. Consider updating to a responsive design if your site is older
  4. Test all changes on multiple devices and browsers
  5. Monitor your analytics to measure improvements

Sometimes small changes can make a big difference. Even if you’re not ready for a complete website overhaul, addressing the most critical mobile usability issues can lead to significant improvements.

The Bottom Line

In today’s mobile-dominated world, having a website that works well on smartphones and tablets isn’t a luxury – it’s a basic business requirement.

Canadian users expect to be able to interact with your business on their phones just as easily as on a desktop computer. When they can’t, they don’t blame their device – they blame you, and then they move on to your competitors.

The question isn’t whether your website should be mobile-friendly, but whether you can afford to lose more customers while you delay making necessary updates.

Featured Image Source: https://pixabay.com/photos/laptop-wordpress-wordpress-design-593673

Technology

Essential Tips for Buying a Laptop: What to Consider Before You Click ‘Add to Cart’

Buying a laptop can be an overwhelming experience, especially with the vast array of options available today. Whether you’re a student, a professional, or just in need of a reliable device for everyday tasks, making an informed decision is crucial. Before you hit that ‘Add to Cart’ button, here are some essential tips to guide you through the buying process and ensure you choose the right laptop for your needs.

1. Determine Your Primary Use

The first step in selecting the right laptop is to define its primary purpose. Are you using it for basic tasks like browsing the web and word processing, or do you need it for more demanding tasks such as gaming, video editing, or software development? Understanding your needs will help narrow down your options and ensure you choose a laptop with the appropriate specifications.

  • Basic Use: If you need a laptop for everyday tasks like emailing, web browsing, and document editing, a device with modest specifications will suffice. Look for laptops with an Intel Core i3 or AMD Ryzen 3 processor, 4GB to 8GB of RAM, and a standard HDD or SSD storage.
  • Multimedia and Gaming: For gaming or multimedia work, a laptop with higher specifications is essential. Opt for an Intel Core i5 or i7 processor, 8GB to 16GB of RAM, and a dedicated graphics card like an NVIDIA GeForce GTX or RTX. Ensure it has an SSD for faster load times and better performance.
  • Professional Use: If you’re a professional working with large files or running demanding software, prioritize a laptop with a powerful processor (Intel Core i7 or i9, AMD Ryzen 7 or 9), 16GB or more RAM, and an SSD. Look for models with higher-resolution displays and enhanced connectivity options.

2. Screen Size and Resolution

The screen size and resolution of a laptop significantly impact your viewing experience. Laptops generally range from 13 to 17 inches, and the best size depends on your preferences and how you plan to use the device.

  • Portability: For those who need a highly portable laptop, a 13 to 14-inch screen is ideal. These laptops are lightweight and easy to carry around but might have smaller keyboards and screens.
  • Productivity and Entertainment: A 15- —to 17-inch display might be more suitable for multitasking or immersive entertainment. However, larger screens mean heavier laptops.
  • Resolution: Full HD (1920 x 1080) resolution is standard and sufficient for most users. For better clarity and detail, especially for professional or creative work, consider laptops with 4K resolution (3840 x 2160). Higher-resolution screens offer more screen real estate and sharper images but can be more expensive.

3. Performance Specifications

When it comes to performance, the key components to consider are the processor (CPU), memory (RAM), and storage.

  • Processor (CPU): The CPU is the heart of your laptop. Intel and AMD are the two main manufacturers, with Intel’s Core i3, i5, and i7, and AMD’s Ryzen 3, 5, and 7 being popular choices. Higher-end processors like the Intel Core i9 or AMD Ryzen 9 are better for high-performance tasks.
  • RAM: Random Access Memory (RAM) affects how many applications you can run simultaneously. For basic use, 4GB of RAM is often adequate. For more demanding tasks, 8GB to 16GB of RAM is recommended to ensure smooth performance.
  • Storage: Modern laptops typically offer SSDs (Solid State Drives) or HDDs (Hard Disk Drives). SSDs are faster and more reliable, providing quicker boot times and file access. A 256GB SSD is a good starting point, with 512GB or more being ideal for those who store large files or run multiple applications.

4. Battery Life

Battery life is a crucial factor, especially if you’re often on the go. Battery longevity can vary widely depending on the laptop model and how you use it.

  • Average Battery Life: Look for laptops with at least 8 hours of battery life for general use. This will ensure that you can get through a workday or class without needing to recharge frequently.
  • High-Capacity Battery: If you require extended battery life, consider models designed for longer use, often marketed as having 12 to 20 hours of battery life. Keep in mind that battery performance can degrade over time.

5. Build Quality and Design

The build quality and design of a laptop affect both its durability and user experience.

  • Material and Durability: Laptops made from aluminum or magnesium alloys generally offer better durability compared to plastic models. Consider a laptop with a robust build if you plan to travel frequently or use it in different environments.
  • Keyboard and Trackpad: A comfortable keyboard and responsive trackpad are essential for long typing sessions. Try out the keyboard in person if possible, or read reviews to ensure it meets your expectations for typing comfort.

6. Connectivity and Ports

Ensure the laptop has the connectivity options and ports you need for your peripherals and accessories.

  • USB Ports: Look for a variety of USB ports, including USB-C and USB-A. Some laptops also offer Thunderbolt 3 or 4 ports for faster data transfer and charging.
  • HDMI and SD Card Readers: If you plan to connect your laptop to external displays or need to transfer files from SD cards, check for HDMI ports and built-in card readers.
  • Wi-Fi and Bluetooth: Ensure the laptop supports the latest Wi-Fi standards (Wi-Fi 6 or newer) for faster internet speeds and Bluetooth for connecting wireless devices.

7. Operating System

Finally, choose an operating system that fits your needs.

  • Windows: Offers a wide range of software compatibility and is ideal for gaming, professional applications, and general use.
  • macOS: Known for its stability and seamless integration with other Apple products, macOS is preferred by many creative professionals.
  • Chrome OS: A more lightweight option that works well for web-based tasks and is typically found in budget-friendly Chromebooks.

Featured Image Source: https://cdn.pixabay.com/photo/2021/03/02/13/04/laptop-6062423_640.jpg

Home

How to Choose Living Room Furniture

Whether you want to update an older living room with hand-me-down furniture or start from scratch, consider your family’s needs and personal tastes. Identify the room’s primary function, such as relaxation and entertainment or gathering with friends.

Choose a focal point to guide your decor choices, such as a fireplace, gallery wall or window. Aim for symmetry, which is appealing to the eye.

Comfort

In addition to aesthetics, your choice of living room furniture should be comfortable and fit the needs of your family and guests. For example, consider upholstery fabric levels – from plush to firm – as well as the level of support and cushioning you desire. Some fabrics are more durable than others, and you should always test out sofas and chairs in a showroom to ensure they’re as comfortable as they appear.

A good starting point is to plan the arrangement of seating around a focal point in the room, like a fireplace or a large window. This helps establish the flow of traffic and creates a natural conversation area for a seating group. A sense of balance can also be achieved through a symmetrical furniture layout. For example, arrange identical sofas on either side of a coffee table or use matching armchairs to flank a corner nook.

Once you’ve established the general layout of your living room, measure the space to determine its dimensions and potential limits. This allows you to narrow your choices of furniture pieces and avoid wasting time on items that will not fit. Using a large area rug as a unifying element can help make an open floor plan feel more cohesive, but make sure that the front legs of all the key pieces sit on the rug.

Style

If your living room is a gathering space for family and friends, you should consider how the furniture will work together to create a cohesive look that makes the room enjoyable. For example, if your space is decorated in an eclectic style, choosing furniture that reflects the same overall aesthetic will help pull the room together.

Alternatively, you can use the space’s natural architectural features to dictate the style. For example, if your living room has an arched doorway, you may want to choose furniture with curves to match the shape of the arch. Similarly, if your space has a fireplace or a window seat, you should select furniture that complements the features of these spaces rather than clashing with them.

Once you’ve decided on the overall style of your space, it’s time to start thinking about the specific furniture pieces. A good rule of thumb is to start with the largest seating piece, such as a sofa or sectional, and position it in front of your room’s focal point, such as a TV, fireplace, gallery wall, or window. From there, you can fill in with smaller seating options, such as chairs and occasional tables. To keep the overall look of your space cohesive, try to stick with a similar fabric palette when choosing seating and accent furniture.

Durability

Choosing furniture made from quality materials is one of the most important decisions you’ll make when selecting living room furniture. The use of high-quality wood or metal and upholstery fabrics that are durable will help your furniture stand the test of time. You’ll also want to consider the type of environment in which your furniture will be kept. Temperature changes and humidity can affect the lifespan of upholstered pieces, as well as the stability of wooden furniture.

A key element of good design is finding a balance between form and function. While many people want to create a unique, stylish living space, the functional elements of a room are equally important. To make sure you’re getting the best value for your money, choose furniture that strikes a balance between these two factors.

Ensure that the proportions of your furniture match the size of your living room. Oversized furniture can overpower a small space, while undersized furniture can look sloppy and unfinished. Once you’ve figured out the size of your living room, use painter’s tape or newspaper to mark out where you’d like potential furniture pieces to go in the space.

Budget

Your budget is one of the most important considerations when shopping for living room furniture. Determine how much you want to spend and what your needs are, including the number of people who will use the space regularly. It’s also helpful to decide if you have any specific style preferences or must-have furniture pieces, such as a sofa or sectional.

Many shoppers start with the sofa, as it’s usually the largest piece and often serves as a focal point in the room. Then, they choose smaller seating options such as chairs and love seats to fill in around the sofa. Finally, they choose a coffee table and other accent furniture pieces, such as ottomans and side tables, to round out the seating arrangement.

The size of your space is another important consideration, as you’ll want to make sure all the furniture fits comfortably within the room. It’s helpful to stage the space and mark out areas where potential furniture pieces will go, using painter’s tape or sheets of paper to get a visual. This will help you avoid wasting money on items that won’t fit.

The fabric you choose for your sofa and other seating is an important decision as well. Depending on your lifestyle and the level of use, you may choose performance fabrics that can handle stains and dirt, or soft, luxurious materials that will complement the room’s decor scheme.

Featured Image Source: https://cdn.pixabay.com/photo/2017/08/27/10/16/interior-2685521_640.jpg

Health

How to Develop a Consistent Exercise Routine That Works for You

Staying active is crucial for maintaining overall health and well-being, but establishing and sticking to a consistent exercise routine can be challenging. Whether you’re starting from scratch or looking to revamp your current routine, creating a plan that fits your lifestyle and goals is key. Building a consistent exercise routine takes time, effort, and patience, but the rewards are well worth it. By setting clear goals, finding enjoyable activities, and staying adaptable, you can create a routine that fits seamlessly into your life and supports your overall health and well-being. Here’s a comprehensive guide to help you develop an exercise routine that you can stick to.

1. Set Clear and Realistic Goals

The first step in creating a consistent exercise routine is to define what you want to achieve. Are you aiming to lose weight, build muscle, improve cardiovascular health, or just stay active? Setting specific, measurable, achievable, relevant, and time-bound (SMART) goals will give you a clear direction. For instance, instead of saying, “I want to get fit,” try “I want to run a 5K in three months.” Clear goals provide motivation and a sense of purpose, making it easier to stay on track.

2. Find Activities You Enjoy

The best exercise routine is one that you look forward to. Experiment with different activities to find what you enjoy—whether it’s running, swimming, cycling, yoga, or dance. If you dread your workouts, you’re less likely to stick with them. Remember, exercise doesn’t have to be a chore; it can be fun and fulfilling. Finding an activity you love can make it feel less like a workout and more like a hobby.

3. Create a Schedule and Stick to It

Consistency is crucial in any exercise routine. Plan your workouts in advance and treat them like important appointments. Decide on the days and times that work best for you, and stick to this schedule as closely as possible. Some people prefer morning workouts, while others find evening sessions more convenient. Choose a time that fits your lifestyle and commit to it. Use a calendar or app to track your workouts and stay organized.

4. Start Slow and Progress Gradually

If you’re new to exercise or coming back after a break, start slowly to avoid injury and burnout. Begin with shorter, less intense workouts and gradually increase the duration and intensity as your fitness improves. For example, start with 20-minute sessions and work up to 45 minutes or an hour. Incremental progress helps build endurance and reduces the risk of overtraining, making it easier to stay motivated and avoid discouragement.

5. Incorporate Variety

Doing the same workout repeatedly can lead to boredom and plateaus. Keep things interesting by incorporating a variety of exercises into your routine. Mix cardio, strength training, flexibility exercises, and recreational activities to challenge different muscle groups and prevent monotony. Changing up your workouts also keeps your body from adapting too quickly, which can enhance overall fitness and prevent stagnation.

6. Listen to Your Body

Pay attention to how your body responds to exercise. If you’re feeling unusually fatigued or sore, it may be a sign that you need to rest or adjust your routine. Overtraining can lead to injuries and setbacks, so it’s essential to listen to your body’s signals. Ensure you include rest days in your schedule to allow for recovery and prevent burnout. Active recovery, such as light stretching or walking, can also help maintain fitness while allowing your body to recover.

7. Set Up a Support System

Having a support system can make a significant difference in maintaining a consistent exercise routine. Share your goals with friends, family, or colleagues, and encourage them to join you in your fitness journey. Exercising with others can provide motivation, accountability, and companionship. Consider joining a local fitness group or class where you can meet people with similar goals and interests.

8. Track Your Progress

Monitoring your progress can be a great motivator. Keep a workout journal or use an app to track your workouts, noting the type of exercise, duration, and any personal achievements. Seeing how far you’ve come can boost your confidence and inspire you to continue. Additionally, tracking your progress helps you identify what works best for you and make any necessary adjustments to your routine.

9. Adapt and Adjust

Life can be unpredictable, and sometimes your exercise routine might need to change. Be flexible and willing to adjust your schedule or routine as needed. If you miss a workout or need to modify your plan due to unforeseen circumstances, don’t get discouraged. Adaptability is key to long-term success. Find ways to incorporate physical activity into your daily life, such as taking the stairs instead of the elevator or going for a walk during lunch breaks.

10. Celebrate Your Achievements

Finally, celebrate your successes along the way. Whether you’ve hit a personal best, reached a fitness milestone, or simply stuck to your routine for a month, take time to acknowledge and reward your efforts. Celebrating your achievements can boost your motivation and reinforce the positive habits you’ve developed.

Featured Image Source: https://cdn.pixabay.com/photo/2022/12/10/05/00/woman-7646602_640.jpg

General

From Fit to Function: Key Factors to Consider When Buying Sports Shoes

Choosing the right pair of sports shoes can make all the difference in your athletic performance and overall comfort. Whether you’re a seasoned athlete or just starting out, understanding the key factors in selecting sports shoes is crucial. This guide will walk you through essential considerations to help you find the perfect pair that enhances your performance and keeps you comfortable.

1. Understand Your Foot Type

The foundation of a good shoe starts with understanding your foot type. Feet comes in various shapes and arches, which play a significant role in determining the best shoe for you. Here’s how you can determine your foot type:

  • Flat Feet: If your feet don’t have much of an arch and they tend to roll inward (overpronation), you’ll need a shoe with extra support and stability.
  • High Arches: If you have a pronounced arch and your feet tend to roll outward (underpronation), you’ll benefit from cushioning and flexibility to absorb shock.
  • Neutral Arches: If your feet have a moderate arch and you don’t have extreme over- or underpronation, a neutral shoe with balanced cushioning should work well.

To determine your arch type, you can do a simple “wet foot test” by wetting the sole of your foot and stepping onto a piece of paper or a flat surface. The imprint will give you a clue about your arch type.

2. Choose the Right Shoe for Your Activity

Different sports and activities require different types of shoes. Here’s a breakdown of some common activities and the types of shoes that are best suited for them:

  • Running: Running shoes are designed with cushioning and support tailored to handle repetitive impact. There are various types, including stability shoes for overpronators and cushioned shoes for underpronators.
  • Training: For gym workouts and cross-training, look for shoes that offer stability and support for lateral movements. They often have a flatter sole and are designed to handle a variety of exercises.
  • Hiking: Hiking shoes need to provide ample support, traction, and durability for uneven terrain. Look for features like waterproofing, rugged outsoles, and ankle support.
  • Basketball: Basketball shoes offer ankle support and cushioning to handle the high-impact nature of the sport. They also provide a good grip for quick lateral movements.

Each sport has its own set of demands, so choosing a shoe specifically designed for that activity is essential to prevent injury and improve performance.

3. Consider the Fit and Comfort

A well-fitting shoe is crucial for both comfort and performance. Here’s what to look for when evaluating the fit of sports shoes:

  • Length: Ensure there is about a thumb’s width of space between your longest toe and the end of the shoe. This prevents your toes from hitting the front of the shoe, which can lead to discomfort or injury.
  • Width: The shoe should fit snugly around the widest part of your foot without being too tight. Most brands offer different width options, so choose accordingly.
  • Heel Fit: Your heel should fit securely in the shoe without slipping or rubbing. A secure heel fit helps prevent blisters and other foot problems.
  • Arch Support: The shoe’s arch support should align with your foot’s natural arch. If it doesn’t, you might need to consider custom insoles or a different shoe.

Try on shoes at the end of the day when your feet are more swollen to get the best fit. Walk around and test them out to ensure they’re comfortable and supportive.

4. Evaluate Shoe Construction and Materials

The materials and construction of a sports shoe impact its durability, comfort, and performance. Here are some key components to consider:

  • Upper Material: The upper part of the shoe can be made from materials like mesh, synthetic leather, or knit fabric. Mesh offers breathability, while synthetic leather is more durable and supportive. Choose based on your activity and personal preference.
  • Midsole: This is the layer between the upper and outsole that provides cushioning and support. Common materials include EVA (Ethylene Vinyl Acetate) and PU (Polyurethane). EVA is lightweight and cushioned, while PU is more durable.
  • Outsole: The outsole provides traction and stability. Rubber outsoles are common and offer good grip, while specialized outsoles might be designed for specific terrains or surfaces.
  • Insole: The insole provides additional cushioning and support. Some shoes come with removable insoles, allowing you to replace them with custom orthotics if needed.

Quality materials and construction contribute to the shoe’s overall performance and longevity, so consider these aspects carefully.

5. Check for Brand and Price Considerations

While brand reputation and price shouldn’t be the sole factors in choosing sports shoes, they do play a role. Established brands often invest in research and development to produce high-quality, performance-oriented footwear. However, this doesn’t mean you should always opt for the most expensive option. Sometimes, less expensive brands offer excellent value for money.

Look for reviews and ratings of specific models to get an idea of their performance and durability. Additionally, consider if the brand offers a satisfaction guarantee or return policy, which can be helpful if the shoes don’t meet your expectations.

Featured Image Source: https://cdn.pixabay.com/photo/2015/10/29/01/24/shoes-1011596_640.jpg